Tuesday, May 14, 2013

Chocolate-Triple Hazelnut Truffles - Gluten Free

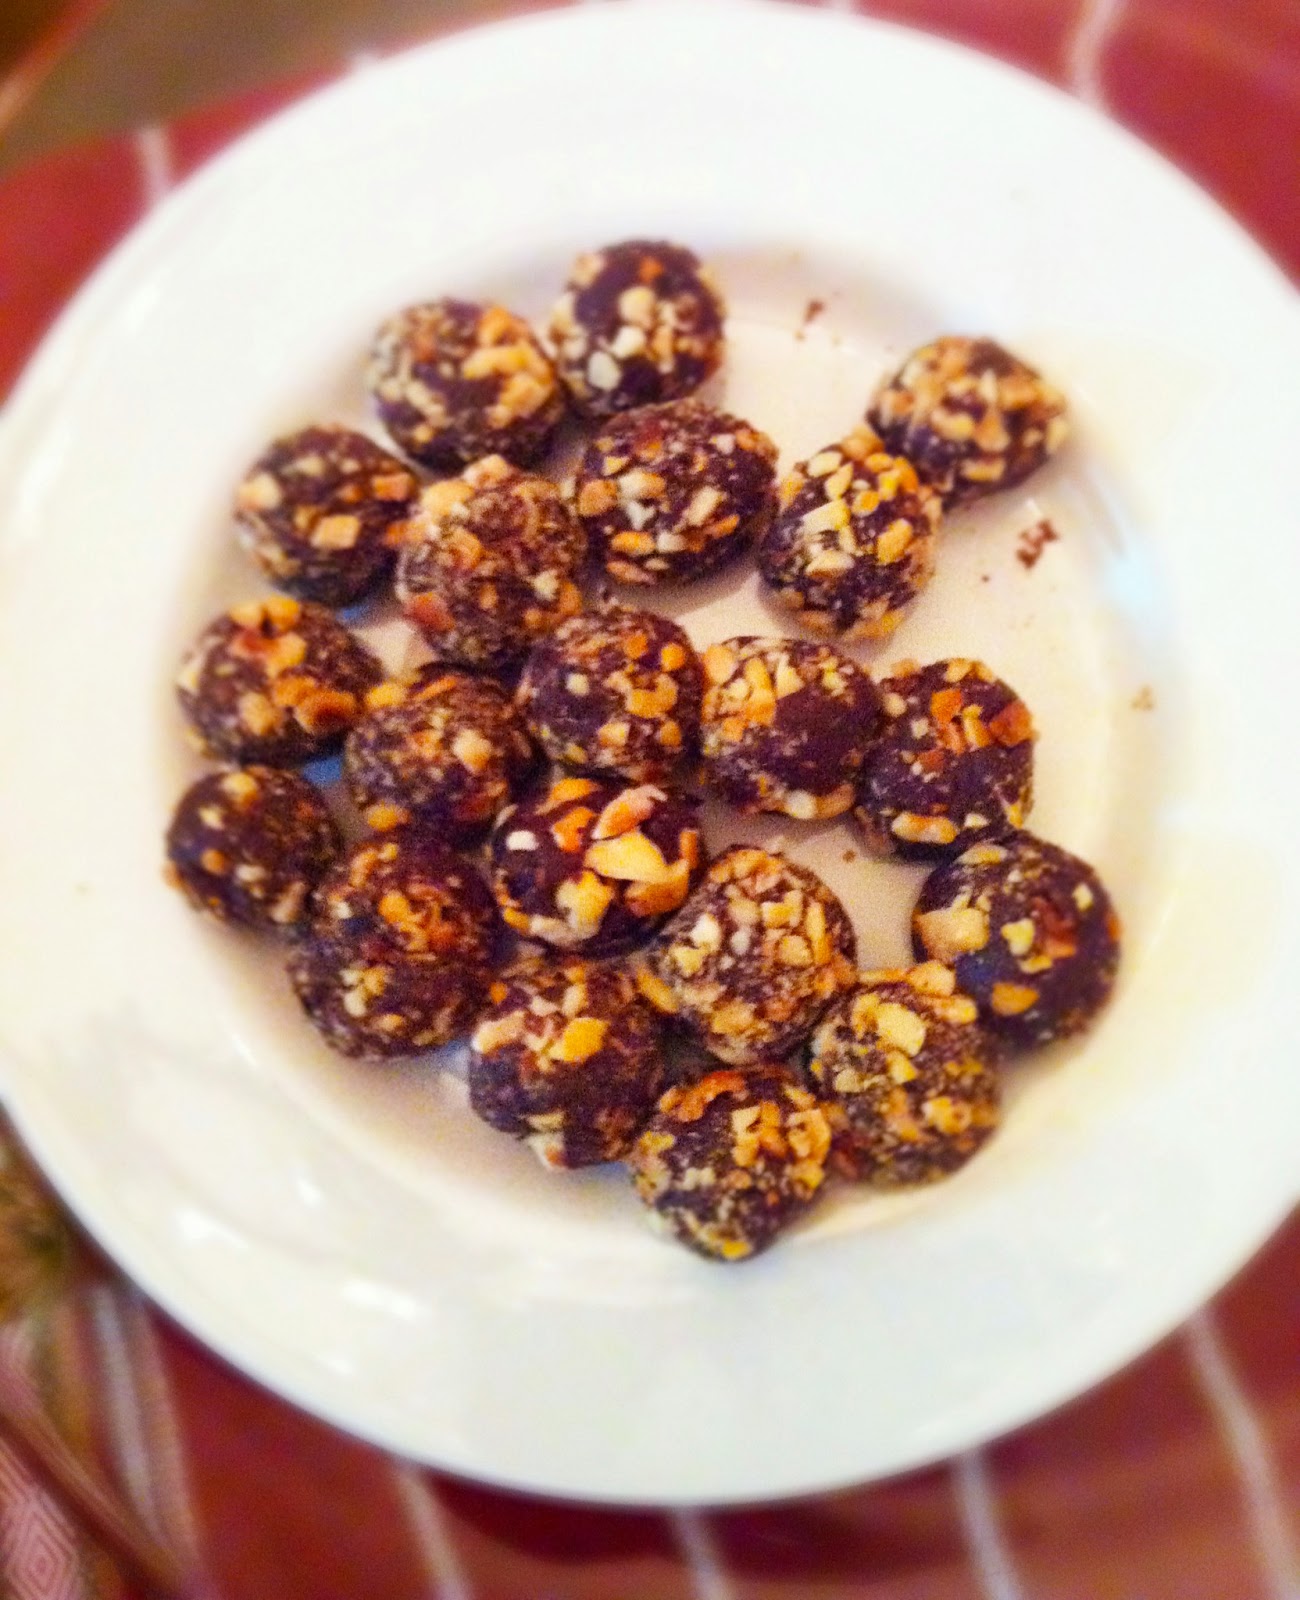
Chocolate-Hazelnut Truffles
I'm a bit behind on my posting. I have so much stuff stored in my photo files and my little kitchen notebook that I will have content for the next 3 months...I just have to actually post it!

In the above photo are Chocolate Hazelnut Truffles that I made around Christmas. Yes, Christmas. They were part of a trio of gluten free treats that I made for the holidays. And believe me, I do realize that was 6 months ago, but better late than never. Besides, you can make these treats anytime.

I got this recipe from Cooking Light and I when I made it, I did NOT have Frangelico. I had some hazelnut flavoring and Kahlua, so I used mostly Kahlua and a bit of hazelnut flavoring. I, as usual, eyeballed it. As for the chocolate, I used dark chocolate because I prefer it. I also used a melon baller. It makes for uniform sized balls. HA! In any event, they turned out de-lish!

Go forth and try it out!

Ingredients
  • 3 tablespoons hazelnut-chocolate spread (such as Nutella) 
  • 2 1/2 tablespoons Frangelico (hazelnut-flavored liqueur)...I actually have used Kahlua
  • 1 tablespoon light-colored corn syrup
  • 1/2 teaspoon vanilla extract 
  • Dash of salt (if you want it a bit saltier, sprinkle 1 tsp coarse sea salt in after chocolate melts and has cooled a minute and then poor into a shallow dish)
  • 5 ounces milk chocolate, finely chopped (I used dark chocolate only because I like it better)
  • 1/3 cup finely chopped salted hazelnuts, toasted
Preparation

Combine the first 6 ingredients in the top of a double boiler. Cook over simmering water until chocolate melts (about 2 minutes), stirring constantly. Spoon mixture into a shallow dish. Let stand at room temperature 6 hours or up to overnight.
Scoop about 1 tablespoon chocolate mixture with a spoon. (Or use a melon baller - that's my favorite way) Dredge in nuts; roll into a ball. Repeat procedure with remaining chocolate mixture and nuts.

Sunday, May 12, 2013

White Chicken Enchiladas with Green Chili Sour Cream Sauce

White Chicken Enchiladas


I have decided Pinterest is just one giant, online, community cookbook. You can find a recipe for nearly everything. If you don't know what you want to make for dinner, chances are you can log on to Pinterest and find a photo so appetizing, so well styled, that you will repin it because it looks so damn good. Then all of a sudden you see another and another, and you have repinned 10 different delicious looking recipes on your food board. And, if you are like me, you already have about 100 different recipes on your food board.
Every once in awhile, I try these recipes that I have pinned. I take a photo of my creation - although it doesn't look quite as appetizing as the well styled, professionally photographed one on Pinterest - and write about it on my blog. Today, I am going to share the White Chicken Enchiladas with Green Chili Sour Cream Sauce.
I have not been eating Gluten much, so I modified this recipe to be a Gluten free version. I used corn tortillas instead of flour in the sauce, I used corn starch or you could use Arrow Root. For the most part, it was fairly easy and pretty tasty and not too spicy. It could even be classified as kid friendly - it certainly is Damon friendly! It's a good one if you are looking for something quick to make and it makes for good left overs too.

Ingredients
8 soft taco size flour tortillas (or corn if you need to be gluten free)
2 cups shredded Monterrey jack cheese, divided
2 cups shredded cooked chicken
3 tablespoons butter
3 tablespoons flour (2 tablespoons corn starch if you need to be gluten free)
2 cups chicken broth
1 cup sour cream
1 (4 oz) can diced green chiles
Chopped, fresh cilantro for garnish
Directions
1. Preheat oven to 425 degrees. Spray a 9×13 inch baking pan with cooking spray; set aside. Mix the chicken together with 1 cup of the cheese.
2. Distribute the chicken and cheese mixture evenly among the tortillas. Roll up and place seam side down in the prepared pan.
3. In a large saucepan, melt the butter. Add the flour; cook and stir for 1 minute. Add the chicken broth, whisking until smooth. Continue cooking over medium heat until sauce is thick and bubbly.
4. Stir in the sour cream and diced green chiles. Pour the sauce in an even layer over the enchiladas.
5. Sprinkle with remaining cheese. Bake for 20 to 25 minutes or until golden and bubbly. Sprinkle with cilantro just before serving.

Thursday, March 28, 2013

That Damn Gwenyth Paltrow is at it again!


If you don't know this already, I am a fan of GP. I like her as an actress - I don't LOVE her, but I like her. I am a much bigger fan of her newsletter/website GOOP and her cookbook, My Father's Daughter. And if you know me, or read this blog(I don't know if a lot of people read this blog), then you know how I loved the cook book. She is the reason that I don't buy salad dressing anymore. She is also the reason for why I use Spelt flour. I'm not going to say that everything in that cook book was a home run, but there were more recipes that I love and make frequently than recipes that are shit. And as a home cook, that's important.

In any event, she has another cook book coming out next week. I was texting with my friend Tanya today and told her that I am going to have to buy it now. She said that it's mandatory and I agreed. I have to buy it on principle and because I NEED to know what the hell is in there that I must make.

Since I subscribe to her online newsletter, today I received the "It's All Good" issue. In that issue, she gives up a few recipes that are included in her new cook book called...duh...It's All Good. The newsletter is just enough to tease you so you say, "Goddammit! Now I have to have this cook book!"

And trust me, if you are like me, that's what will happen. That is exactly how she got me in the first place. Note my prior blog post on the Linguine con le Vongole that was in her first book. I made a few things that she put out online and then I couldn't take it anymore - I needed to find out exactly what was in that book.

Anyway, check out her latest newsletter and decide for yourself if you are going to be a sucker like me.

For your enjoyment...http://www.goop.com/journal/make/218/its-all-good

You're welcome.


Tuesday, February 26, 2013

I Love Chocolate Chip Cookies

The Best Chocolate Chip Cookies
As I have stated before, I am OK at baking cookies - my sister is far better at it than I am. Hers always turn out chewy and delicious no matter what recipe she uses. Last night, I made some Chocolate Chip cookies for a friend of mine. I didn't want to make her any old kind of cookie, I wanted her to have something delicious like my sister's. So I had to go searching for a recipe and I think I found it.
Let me tell you straight away, this cookie is full fat goodness. It's not a spelt flour, agave syrup substituted for sugar type cookie that I have been making. This cookie is the real deal. I found it on All-Recipes and it is even called "Best Chocolate Chip Cookies".
This recipe makes exactly 48 cookies. I did my own thing by using white chocolate chips and dark chocolate chunks and omitted the walnuts. The dough recipe is what I was really after.  They turned out delicious and the next day still delicious.
If you are looking for a nice chewy cookie recipe, this is the recipe to use.

Best Chocolate Chip Cookies

Ingredients:
1 cup butter, softened
1 cup white sugar
1 cup packed brown sugar
2 eggs
2 teaspoons vanilla extract
3 cups all purpose flour
1 teaspoon baking soda
2 teaspoon hot water
1/2 teaspoon salt
2 cups semi-sweet chocolate chips (I used 1 cup white chocolate chips and 1 cup dark chocolate chunks)
1 cup chopped walnuts (optional)

Preheat oven to 350 degrees

Cream together the butter, white sugar, and brown sugar until smooth. Add the eggs one at a time, then mix in the vanilla. Dissolve baking soda in hot water. Add to batter along with the salt. Mix in the flour 1 cup at a time until fully incorporated. Fold in chocolate chips and nuts(if using).

Drop about a 1 tablespoon scoop of dough onto a lightly greased cookie sheet, 12 to a sheet. Bake for 10 minutes or until edges are golden brown.

*I found that living at sea level, baking is a bit different. 10 minutes exactly is what I needed.


Monday, February 25, 2013

Going Gluten & Dairy Free: Pumpkin-Cran Muffins


Pumpkin-Cran Muffins
I would like to start by saying that I am not on a crazy-ass diet. I have had a few allergy issues and have  found that eating gluten free relieves some of my symptoms and many of the gluten free recipes are also dairy free. So there.
I've been trying out a few recipes from various sources and this one is adapted from the Practical Paleo cook book. I have made this recipe twice, once with all purpose gluten free flour and once with coconut flour. My second attempt was much better. I have tweaked the recipe from the original. I found that the original was too oily from too much coconut oil, but that could have been due to the fact that I used all purpose GF flour instead of coconut flour. This recipe says that you could use either coconut oil or butter, but I have swapped coconut oil for butter before and the result was the same - too oily. To all of you gluten free naysayers out there, I will say that the following recipe produces a muffin that does not taste like a piece of cardboard. My husband ate them and would have never known that they were gluten and dairy free. So try the recipe, I think you will be surprised!

Pumpkin-Cran Muffins (makes 12 muffins)

Ingredients:
6 eggs
1/2 Cup Pumpkin Puree
1/3 Cup Coconut Oil melted (if you use butter, use 1/2 cup melted)
1/4 Cup Maple Syrup
1/4 Cup Brown Sugar(optional - if your going paleo totally omit this)
1 tablespoon Vanilla
1 tablespoon Pumpkin Pie spice + a couple of dashes of ground clove
1/4 teaspoon Salt
1/2 teaspoon Baking Soda
1/2 teaspoon Baking Powder
1/2 Cup Coconut Flour (if you don't have or can't find - All Purpose GF Flour works, but I would use about 2/3 cup)
1/2 Cup Craisins(if you hate craisins - skip them!)

Preheat Oven to 350 degrees

Mix the first 8 ingredients together until completely combined and smooth. Sift in the baking soda, baking powder, and coconut flour and stir until combined. Last, fold in the Craisins - unless you hate them, then don't.

Coat muffin tins with coconut oil or paper muffin cups. Add batter equally amongst the 12 muffin tins and bake for 30-35 minutes or until a tooth pick comes out clean.


Wednesday, February 13, 2013

Turkey Gumbo

Turkey Gumbo
To be honest with you, this post has been sitting in my draft file for a long, long while. I originally wrote it right after Thanksgiving and as I do, I got sidetracked...and then it was Christmas. I did make this twice over the holidays: once after Thanksgiving and once after Christmas.

For the past few years I have been making turkey gumbo instead of turkey noodle soup. We were really burnt out on the turkey noodle and I felt the gumbo was a good alternative. Besides, my family really liked it. The past two years, I have been making this gumbo after Christmas as well. Damon's grandmother sends up about 10 pounds of Gulf Shrimp to my Father-in-Law, Ron. While he likes shrimp a whole lot, he's no about to eat 10 pounds of it. So, perfect for the gumbo! Now, I do want to note that I am in no way, shape or form, from Louisiana. I also do not have an heritage from the south - I just really like Cajun and southern food. I've spent a fair amount of time there and I figured out how to cook the food pretty well. So, just put that judgement aside!

This recipe comes from a few that I put together. About 4 or 5 years ago, my mother-in-law, Sam, and I were shopping in this kind of weird, souvenir store in Florida and I found this book called Louisiana Entertains. It's a crazy-ass recipe book, with some great recipes and some questionable ones. It also tells you how to properly entertain, southern style. I loved it. I bought it. I cook from it and have combined several gumbo recipes to make the one that I use now. So, I hope you enjoy it!

Turkey Gumbo

1 bunch of green onions minced
1 small yellow onion minced
3 garlic cloves minced
1 green pepper diced
1 jalepeno diced
4 tomatoes diced
1 cup or 1 small bunch flat leaf parsley minced
1 tspn fresh minced oregano
1 tspn fresh minced thyme
1 bay leaf
2 ribs celery diced
2 carrots diced(optional)
4-5 strips of bacon
2 andouille links sliced
1/2 pound shrimp, peeled and deveined
2 tblsp flour or Corn Starch
2 tblsp corn oil
1 quart Turkey Stock (or chicken stock) plus 1 cup of water

In a 5 quart cast iron pot or dutch oven, over medium heat, fry the bacon strips. Once finished, remove bacon strips and set aside. Next, add the 2 tablespoons corn oil and let it heat up about 1 minute. Add to the heated oil the onion and sauté for about 1 minute. Add the garlic, green pepper, jalepeno, and tomato, and sauté for another minute. Add the 2 tblsp flour(if you are gluten free like me - use corn starch). The mixture will start to look thick and clumpy - add the cup of water a bit at a time until it smooths out. Now add all of the rest of the ingredients to the pot and give it a good stir, turn the heat down to medium and cover and simmer for about an hour, stirring occasionally.

Serve it with rice, or eat it like soup! Before the gluten situation, I used to love to eat it with a bit of French bread with Provolone Cheese melted right on it!

Monday, November 26, 2012

Mongolian Beef

Mongolian Beef

As I previously predicted, I flaked out. I didn't completely flake, but I have not been keeping up with my posting. From everything that I have been learning about social media, blogging, and blah, blah, blah, etc. is that posting regularly and multiple times a week drives traffic to your blog. While that is very relevant for my job - here...I'm not that concerned yet!
I have been cooking though! I'll catch up, and I have a lot to catch you up on...so, let's get started. The photo above is the Mongolian Beef recipe from the November anniversary issue of Cooking Light. This recipe is great if you are short on time. The other great thing is that the majority of the ingredients are those that should already be in your pantry. I did make a couple of changes. I did not have peanut oil and substituted vegetable oil. You could use canola oil too. Part of the reason that peanut oil is being used is because it can withstand higher heat. Vegetable oil can too but is not as healthy. Canola oil can be used in a pinch but may not handle the heat as well.
My sister wanted to make this recipe and I suggested that she use canola oil to her as she did not have peanut oil. It seemed to work out for her. I also suggested that she cut the amount of chile paste in half because it's kind of spicy. I went for full spice...maybe a smidge extra, Damon and I are spicy folks. Both my sister and I added extra veggies. I added broccoli and carrots and she may have too - but to be honest, I forget if she did!
This recipe is great. It's fast, easy, and pretty tasty. We've made it twice and it was something easy enough for Damon to make (I'm teaching him to cook a few things...as they say "teach a man to fish").

Mongolian Beef

Ingredients
2 tablespoons lower-sodium soy sauce 
1 teaspoon sugar 
1 teaspoon cornstarch
2 teaspoons dry sherry
2 teaspoons hoisin sauce
1 teaspoon rice vinegar
1 teaspoon chile paste with garlic (such as sambal oelek)
1/4 teaspoon salt
2 teaspoons peanut oil (vegetable or canola oil will work too)
1 tablespoon minced peeled fresh ginger
1 tablespoon minced fresh garlic
1 pound sirloin steak, thinly sliced across the grain
1 cup chopped broccoli (optional)
2 carrots sliced (optional)
16 medium green onions, cut into 2-inch pieces

Directions
Combine first 8 ingredients, stirring until smooth.
Heat peanut oil in a large nonstick skillet over medium-high heat. Add minced ginger, minced garlic, and beef; sauté for 2 minutes or until beef is browned. *If you are added broccoli and/or carrots add it here and sauté for about 2 minutes. Add green onion pieces; sauté 30 seconds. Add soy sauce mixture; cook 1 minute or until thickened, stirring constantly.

Note: If you feel like you need a bit more "sauce" add about 1/4 cup of water at a time until you reach a desired consistency. I used about a 1/2 cup of water... and it's because I added broccoli and carrots and it sucked up all the sauce!

Enjoy!